Next up in my “How To” series (previous info on Sending ARCs to a Kindle is HERE), is a fairly powerful function of Amazon advertising that can be easy to wrangle, if you have some understanding of what you’re aiming for. This is different than other Amazon “ads” in the sense that its more artistic and eye-catching information that is on the product’s page. Amazon calls these groups of pictures, words, and information: A+ Content
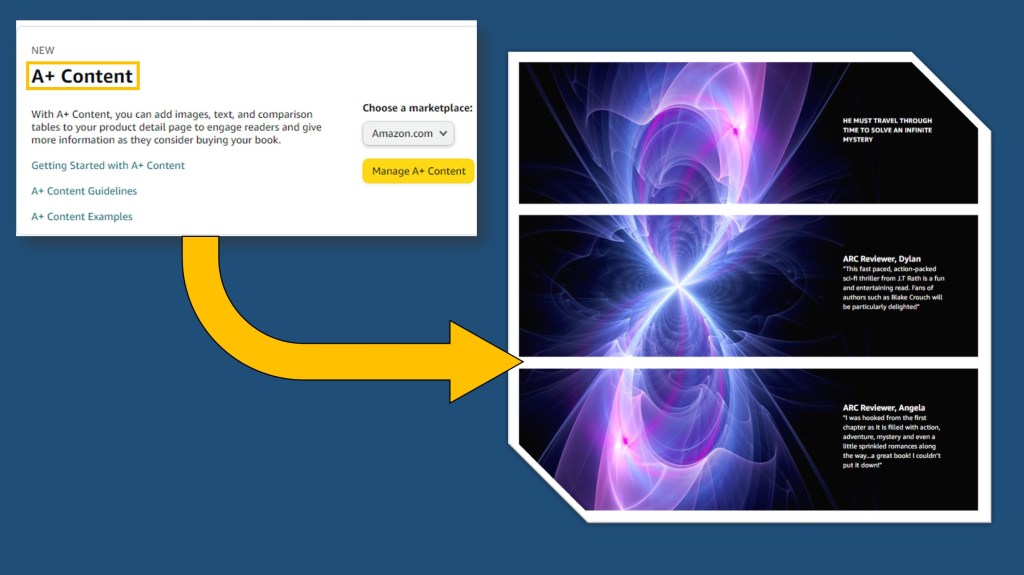
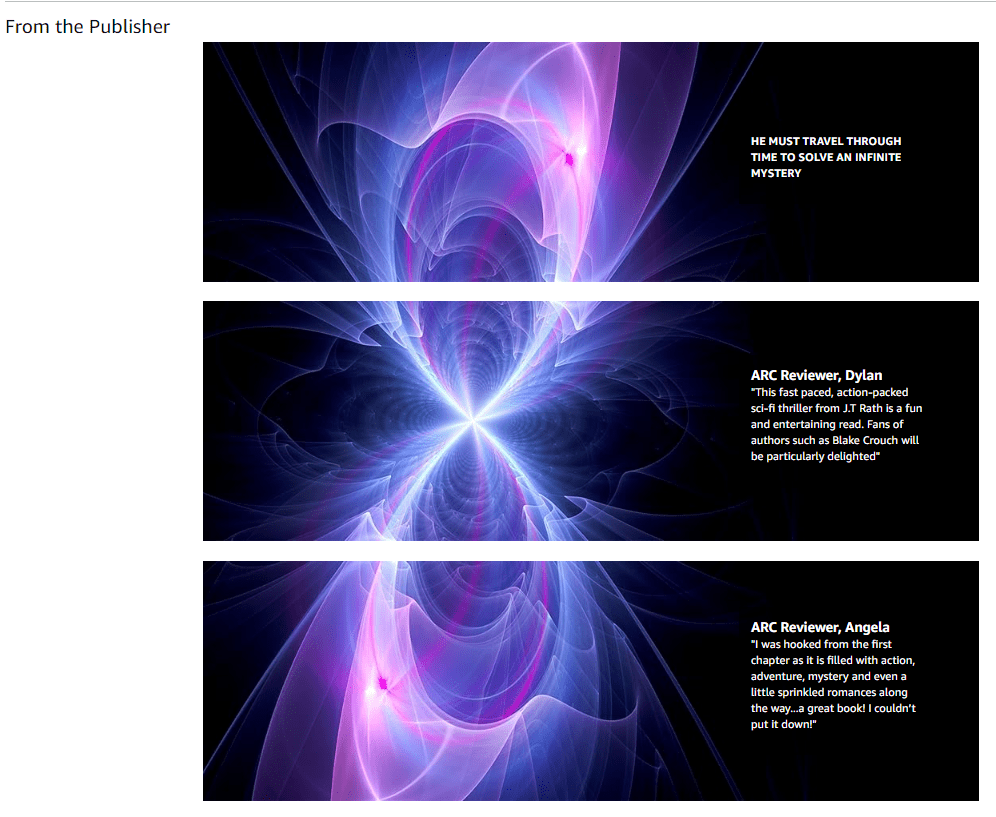
To give you an example of what we’re talking about, let me first show you Infinitude‘s A+ Content, a trifold of sorts, that I created for its release. I’ve found the trifold type is one of the most popular among authors and can be effective if done well, so it’s the type of content we’ll walk through today.
Getting Started – navigating to A+ Content
- Log into your KDP profile. This is the first order of business, aside from writing the book, having a KDP profile, and having said book published with KDP. If none of those things are true, this probably isn’t the How To article for you!
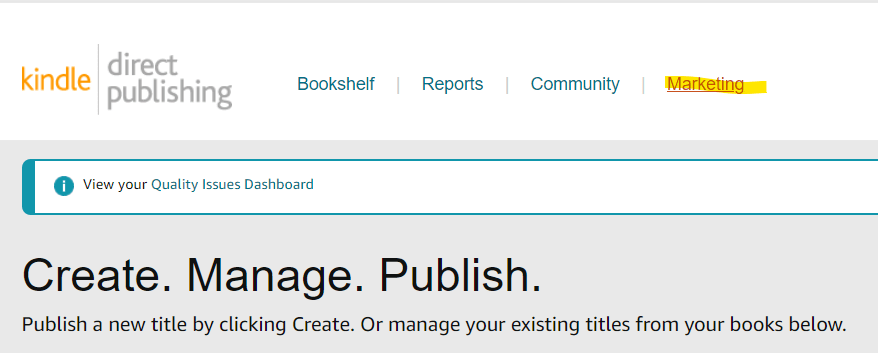
- Along the top, click “Marketing” (upper right)
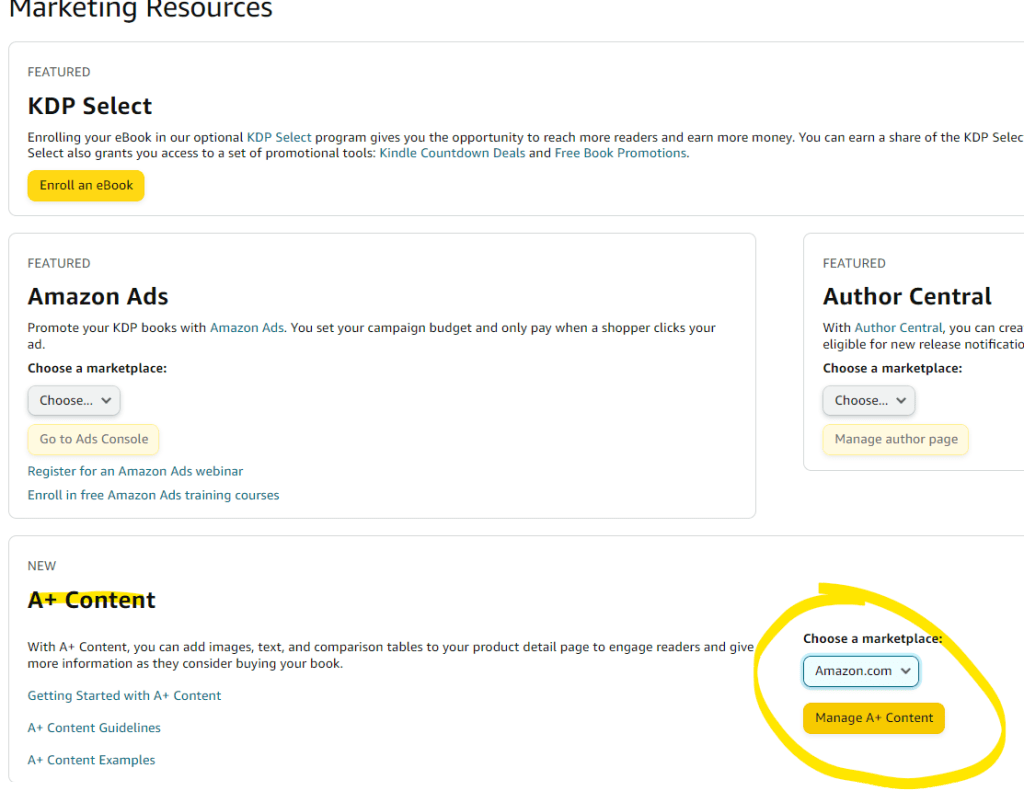
- Scroll part way down the page and find “A+ Content”
- Note: this marketing page also houses useful tools like Amazon ads, KDP select enrollment, Author Central, and the ability to run a price promotion and/or nominate your eBooks for Kindle Deals/Prime Reading. I highly recommend spending some time here and familiarizing yourself with these options!
- Select “Amazon.com” from the “Choose a Marketplace” dropdown, or wherever you’d like the content to run (e.g. Amazon EU, Germany, etc.)
- Click “Manage A+ Content”
- Once you’re in the A+ Content Manager, click the green button on the far right, “Start creating A+ content”
Setting it Up – building your A+ Content module(s)
- Notice the screen you’re in provides a timeline of next steps
- Name your content in the box on the far left and choose your language
- Click “Add Module” in the center bottom

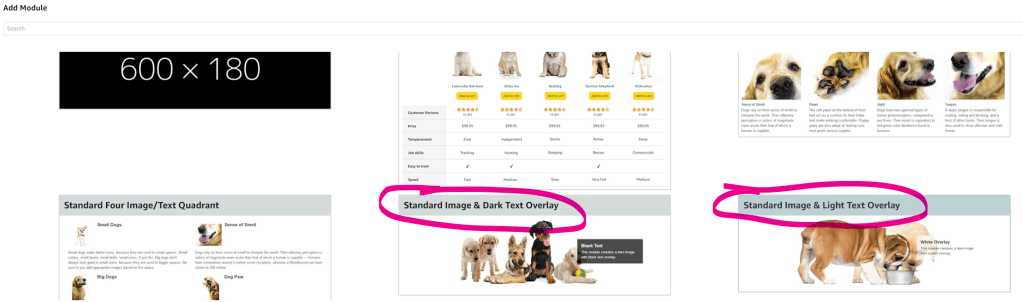
- It’s here where you’ll see all modules available to you. There’s a lot to choose from and while today is focusing on the trifold approach, don’t be afraid to play around with these!
- To get the trifold approach, select either “Standard Image & Dark Text Overlay” or “Standard Image & White Text Overlay” depending largely on the color of images you’ll be selecting. These are located in the second row of options (~repeat start here~)
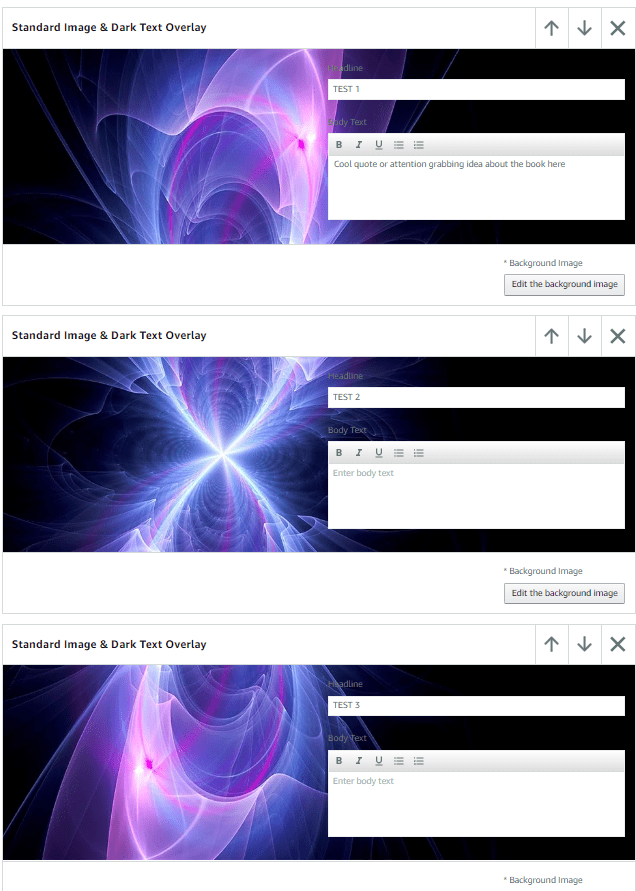
- The next screen will show your module thus far. It’s here you start building!
- If you want a Headline in your image’s text, enter it here
- Similarly, if there’s Body Text you want, enter it here
- Select your image by clicking “+Add background image” button (more on how to create these images below. Feel free to jump there now if you need!)
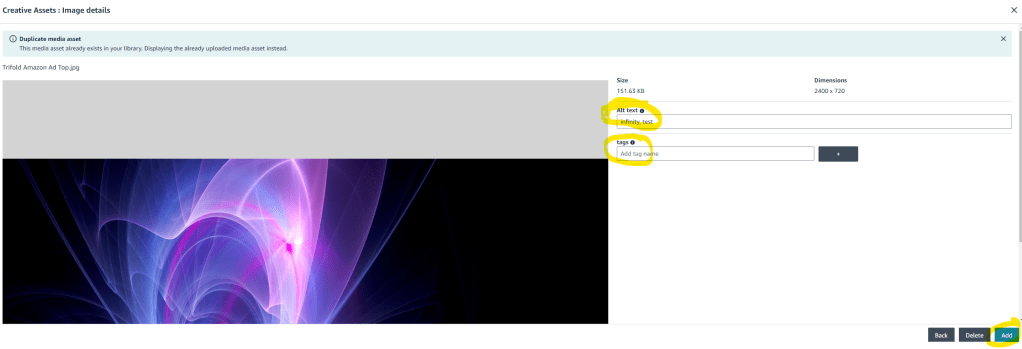
- Navigate toward the saving point in your computer where you’re housing the image and upload it. You’ll see a screen that may look weird and will require some information from you
- Enter any Alt Text in the box on the right. Amazon will not let you continue without doing so.
- If you don’t know what Alt Text should contain, hover/click the “?” symbol next to it. Amazon does a good job providing some examples
- Enter any Tags you may have. This is not required, but encouraged
- Click “Add” button in the bottom right corner
- Repeat the process of adding a module (look for ~repeat start here~ several steps above) for the Center and Bottom modules
- By the end, you should have something that looks like the below image:
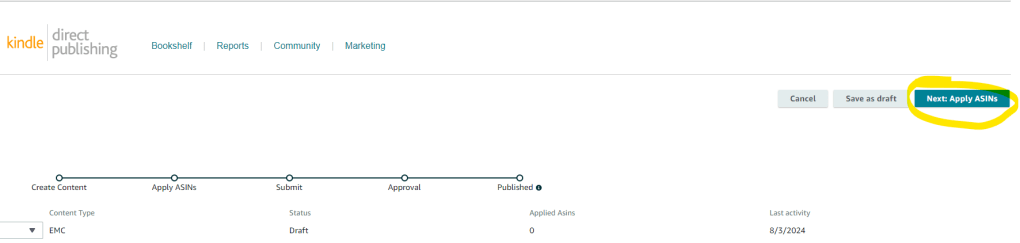
- Once you like your image alignment and your text overlays, scroll to the top of your page and select the green button the far right, “Next: Apply ASINs”
- Enter the book’s ASIN where you wish this content to be placed on. If you don’t know this number, Save as Draft, and navigate back to your KDP bookshelf. You’ll notice that ASINs are listed near each book type
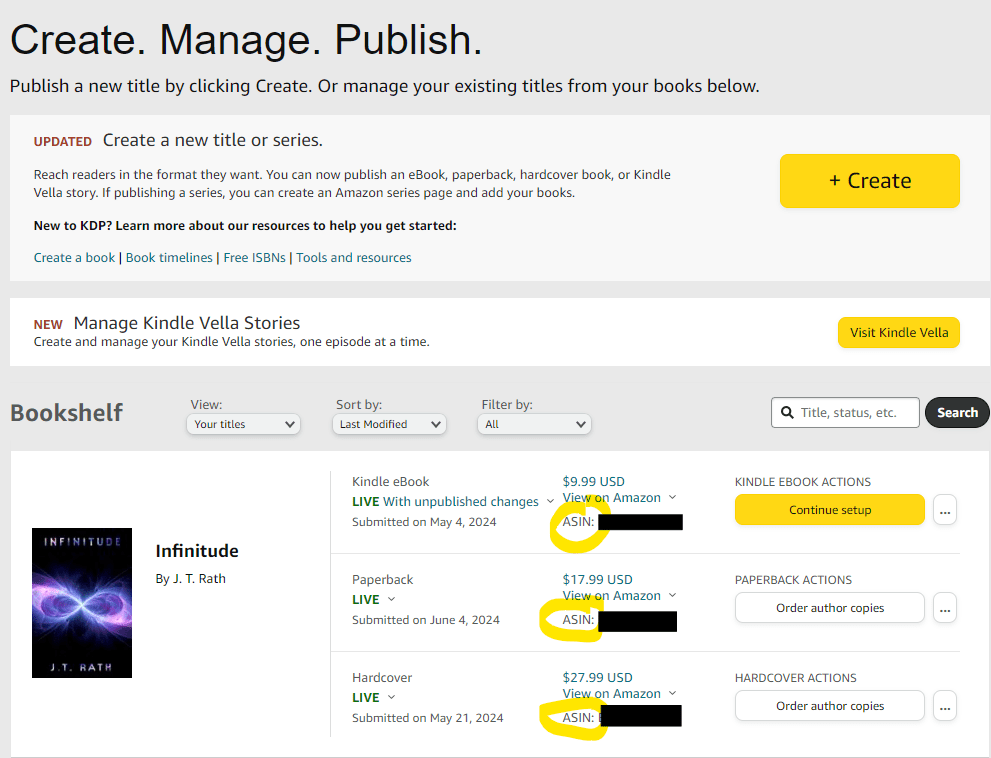
- Select the ASIN’s you’d like the content to run on. You can add more than 1 for the same product. For example, I have a paperback, Kindle, and hardcover Infinitude “product” and my A+ content is on each
- Click the “Next: Review and Submit” button in the upper right hand corner. From here you should be able to see one final preview and submit your content for approval
- I found that approval can take 7-10 business days…quite a long time! Mark a reminder on your calendar at 5 days to check on the status and keep coming back to it. If Amazon rejects it, there should be some description as to why (or you can use Google to look at oft-used reasons/verbiage)
Image Creation – structuring a “tri-fold” A+ Content type (in Powerpoint)
I’m going to be less prescriptive in this final block because there are truly so many ways to do this. You could use simple programs like Microsoft Paint, or more advanced ones like Photoshop. However, I am pretty efficient and skilled in Powerpoint (yes, Powerpoint!) so that will be the basis of my walkthrough here.
- Determine which image you’d like to use to split into a trifold pattern. This will likely be some variation of your cover or character artwork
- Pick something that has enough verticality to be split into thirds
- Pick something that can either sit on the left hand side of the image(s) or has blank space on the right hand side. Remember, the right hand side will be taken up by your text boxes in the module!
- *NOTE* There are many variations of MS Office. Your location of icons may not map 1:1 where I’m showing/saying. Google is your best friend with MS Office!
- Open Powerpoint with a blank document and navigate to the “Design” ribbon at top
- Select “Slide Size” on the far right side
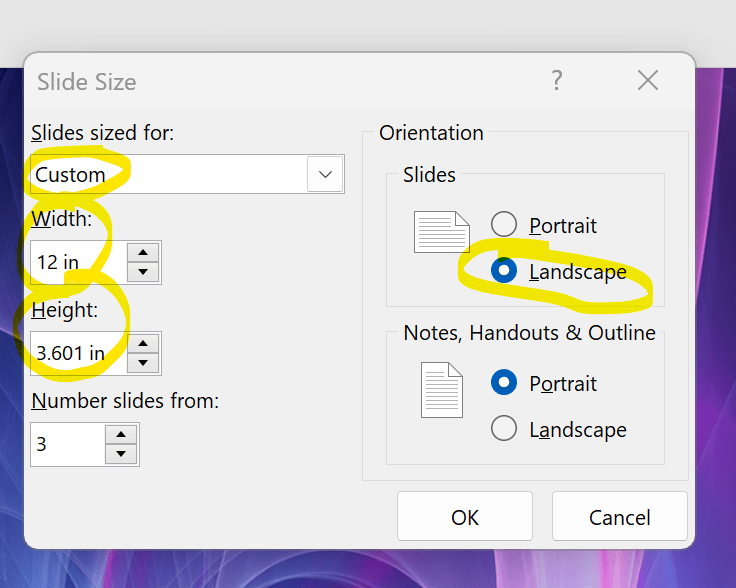
- Select “Custom Slide Size” from the drop down

- Type in a custom slide Width and Height. I also changed my orientation to Landscape. You may have to play around with this to get it just right! For mine, I chose the following
- Width = 12 in
- Height = 3.6 in
- Once you have your slide sizes, Copy+Paste or Import your desired image onto your slide
- Be sure to use the highest-definition image you have available
- Remember, you’ll want to keep it on the LEFT HAND SIDE(!) as the text overlay occurs on the right
- Create 2 new slides and Copy+Paste the entire image you’re using on those slides too. You’ll come back to these
- On your original slide, Crop the image into horizontal thirds. You’re welcome to get mathematical about this, but I found it pretty easy to eyeball + the crop functionality is highly precise
- If you need more precise cropping capabilities, zoom-in on the slide
- If your image doesn’t fill the entire slide, don’t hesitate to take a core background color from it and set it as the slide background
- For example, I had to set my background as black as the image didn’t fully cover the slide
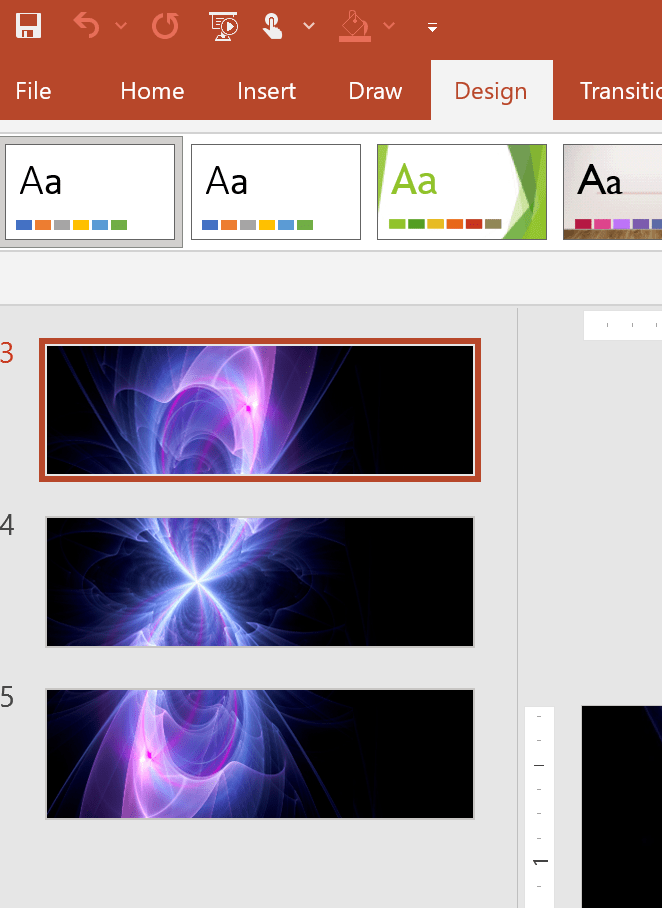
- For slide 2 and 3, crop the image into a middle third and a bottom third.
- You should end with something like this:
- Home stretch! Now you’re going to save these PPT slides as images
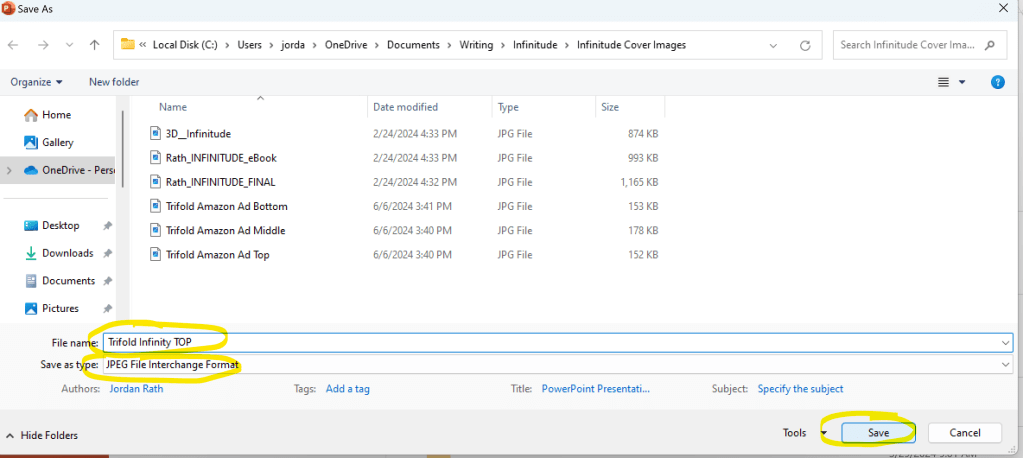
- While you’re on your first slide, go to File > Save As > Select a Folder
- For “Save as type” select JPEG or PNG file type (about halfway down)
- Change the name whatever you want to name the image + “TOP” and click Save
- In the pop-up that appears, select “Just This One“. This image is now saved as a JPEG or PNG in the folder and ready for use in your A+ Content Module!
- Repeat these steps for the Middle/Center and Bottom images of the trifold
I hope this walkthrough has been helpful! I know it took me a couple tries to get the hang of it, but I’m pleased with the end result looking really impressive on Amazon. Given this is a completely FREE option, I 100% think it’s worth taking the 1-2 hours to set it up and make your book’s landing page that much more impressive.

Leave a comment